Thursday, 23 March 2017

BLENDING (UCP BUILDING)

 I opened a UCP building picture which I want to add 

rough/dirty wall to its’s side (blend). Then opened 

another picture (grungemap) which will be the 

rough wall. I tried to move the rough wall by 

dragging it to the UCP picture page but was unable 

to.


I then selected it, copied and pasted it on the UCP picture to achieve this picture

I selected the rough wall then checked the show transform controls on the menu bar to resize the wall to fit the side of the building picture after which I reduced the opacity to 59% to be able to see through.


Then, I clicked on switched between free transform and warp modes on the task bar to be able to resize to fit in the side of the building wall. When I can see that it fit perfectly well, I checked the tick sign beside the free transform and warp mode to achieve this:  

SELECTION TOOL FIRST PRACTICE

This is my first work on how to use selection tools. It was hiding somewhere, just dig it out and thought it will be good if I post it.

After uploading the picture from VLE to the photoshop, I then used polygonal lasso tool to select the building in the first picture. Although other selection tools were tried, but I finally decided to use polygonal lasso tool because it's a bit easier for me to use.


 After, I copied the picture and pasted it on the second picture (using the second picture as background) to achieve the third picture below. . 

Tuesday, 21 March 2017

NEW PICTURE TO OLD TRANSFORMATION


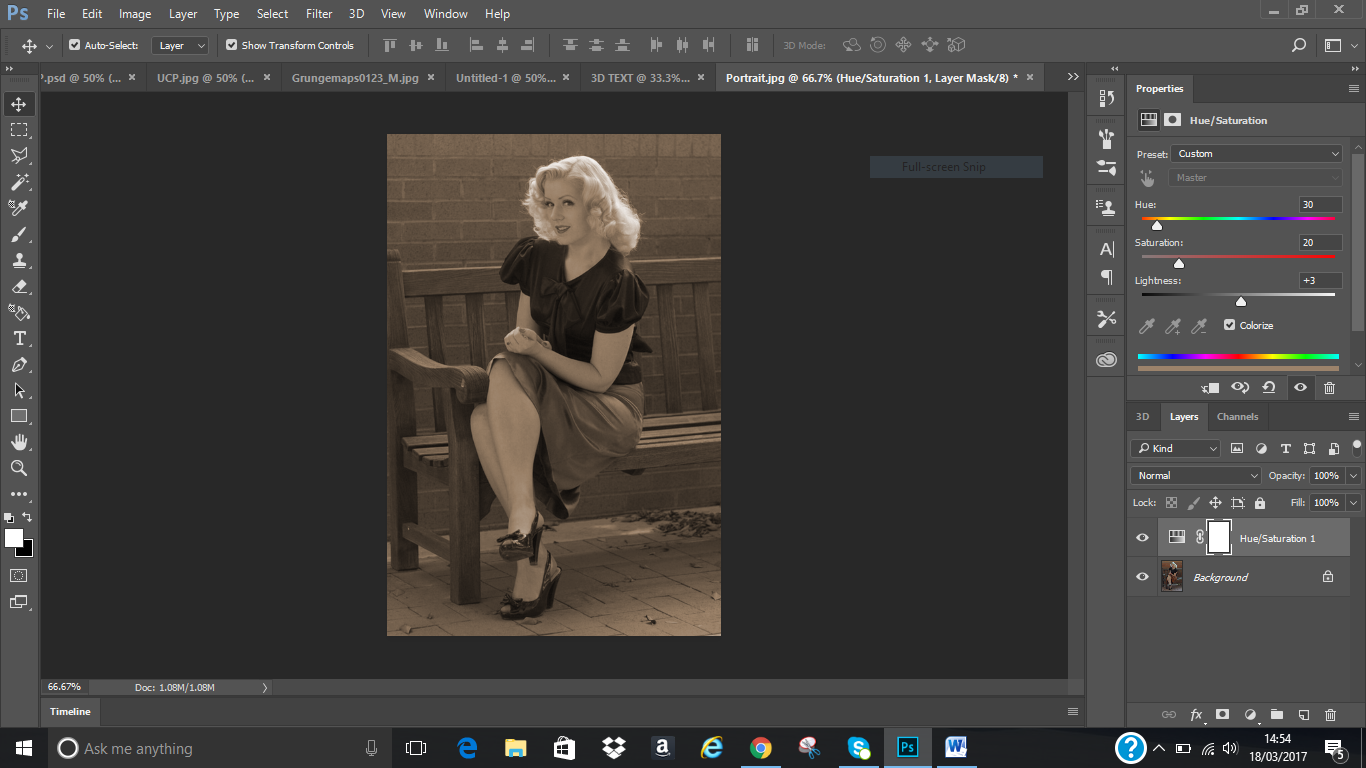
I opened a picture I wanted to transform.  Clicking on create new fill or adjustment layer which is on the bottom right of Photoshop, I was able to click on hue/saturation which allows me to adjust the picture. I checked the colorize colon then adjust the hue to 30, saturation to 20 and lightness to 3, I was able to achieve this picture. 


The original picture that was transformed is the one on the right hand.

HUE/SATURATION (Another method)


Just being curious and thinking there should be another method/way of using Hue/Saturation. I started surfing the internet (youtube to be precise) and was able to know how to go about it using another method.
The picture on the right hand side is the original tulip picture I considered which was downloaded from VLE. (Recommended by the lecturer).


Clicking on create new fill or adjust new layer at the right hand side bottom of the Photoshop, I used the quick selection tool to select the part I will like to apply the colour to. After, I checked on the colorize icon on the right hand side in the hue/saturation then adjusted the lightness to -45, saturation to 46 and hue to 308, I was able to achieve this picture on the right hand side. 

HUE/SATURATION (TULIP FLOWER)


Following the method taught in class, I used hue/saturation to change one of the tulip flower colour. By clicking open in file and choosing the tulip image then clicking on create new fill or adjust new layer at the right hand bottom of the Photoshop, I was able to select hue/saturation. Then, adjusting hue to -43 gives the tulip red colour. 


Using brush tool and putting in mind that black colour conceal while white reveal, I was able to use black colour to conceal most of the red colours to reveal the original colour of the tulip flower and leave just one flower to be red.


Wednesday, 15 March 2017

NEW PENGUIN

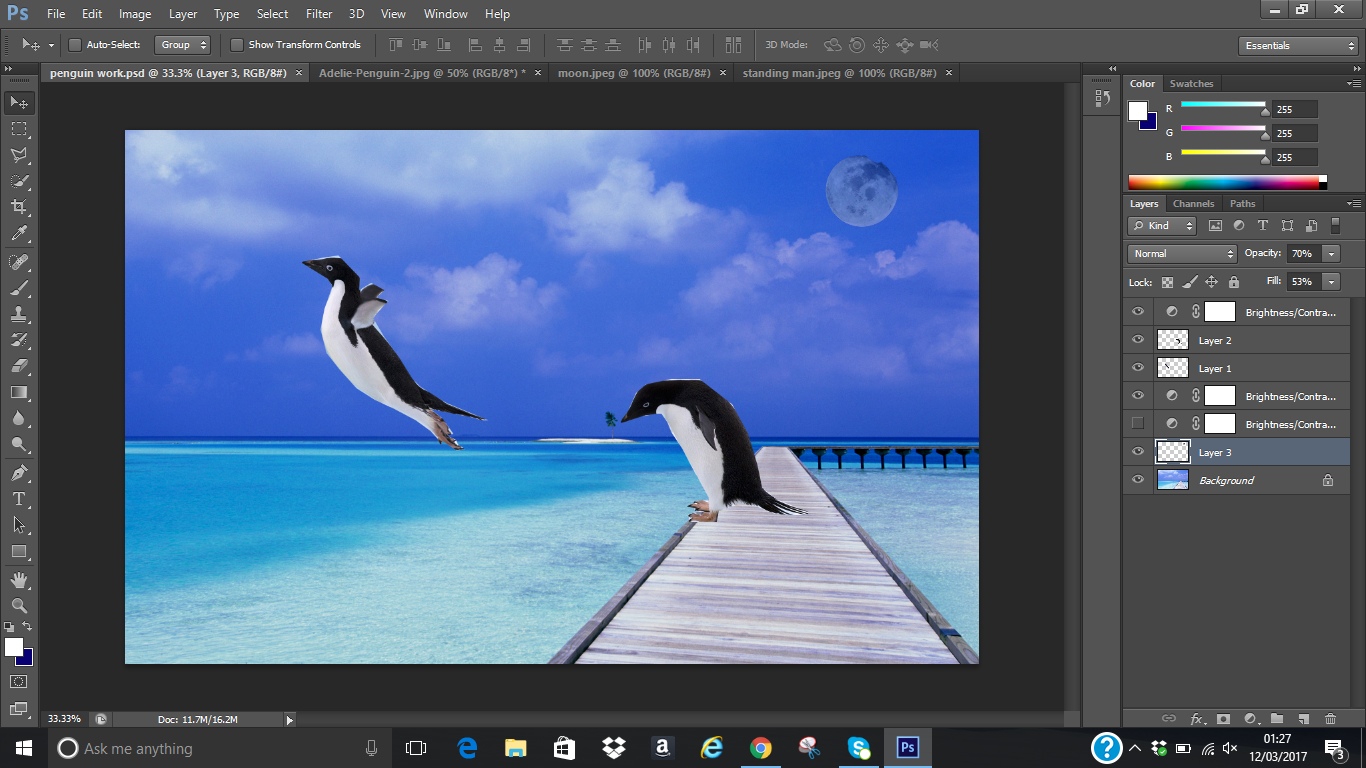
I actually tried another Photoshop with the penguin. This time around I added a man walking. I used polygon lasso tool to select  the penguin and the man and placed on the background. I am satisfied this time around with the penguin shape. I used opacity of 61% for the moon. I also set the brightness to -40% because I wanted it to look like it was getting to evening. Contrast remain at 0. This is the image I finally come up with. Although the moon I used was very tiny, in the process of trying all the icons I was able to enlarge it but forgot what I did to enlarge. I remember I adjusted the width and height but can't remember to what figures. I tried to use create new gradient map adjustment layer but did not like what I saw so I left it looking like this picture below.


FIRST PHOTOSHOP

 This exercise was done in class. First time ever I
 will use Photoshop. Hmm... not bad though.
The two images was gotten from the internet. What I was to do is to move the penguin from the second picture into the first picture using lasso tool.

.

First thing I did was to click on the lasso tool and clicked polygon lasso tool to see how it will work for me. I used the polygon lasso tool to select the first two penguins one after the other by clicking and dragging the cursor to get dotted lines for the selection. When the line meets, that is, when I got to the starting point, the dotted line automatically joined and it was visible with the way the dotted lines were shaking.I then dragged the image onto the first image that is meant to be the background.


Now, this is the new image I got. I added moon to the background image to give it an evening look. I actually adjusted the moon shade by using brightness/contrast icon on the right hand side of the adobe Photoshop.

I am not fully satisfied with the shape of the flying penguin's head (not a smooth head from my selection) and I decided to do it again and correct myself to see if I will be better.
Until then, bye.