Tuesday, 21 March 2017

HUE/SATURATION (TULIP FLOWER)


Following the method taught in class, I used hue/saturation to change one of the tulip flower colour. By clicking open in file and choosing the tulip image then clicking on create new fill or adjust new layer at the right hand bottom of the Photoshop, I was able to select hue/saturation. Then, adjusting hue to -43 gives the tulip red colour. 


Using brush tool and putting in mind that black colour conceal while white reveal, I was able to use black colour to conceal most of the red colours to reveal the original colour of the tulip flower and leave just one flower to be red.


Wednesday, 15 March 2017

NEW PENGUIN

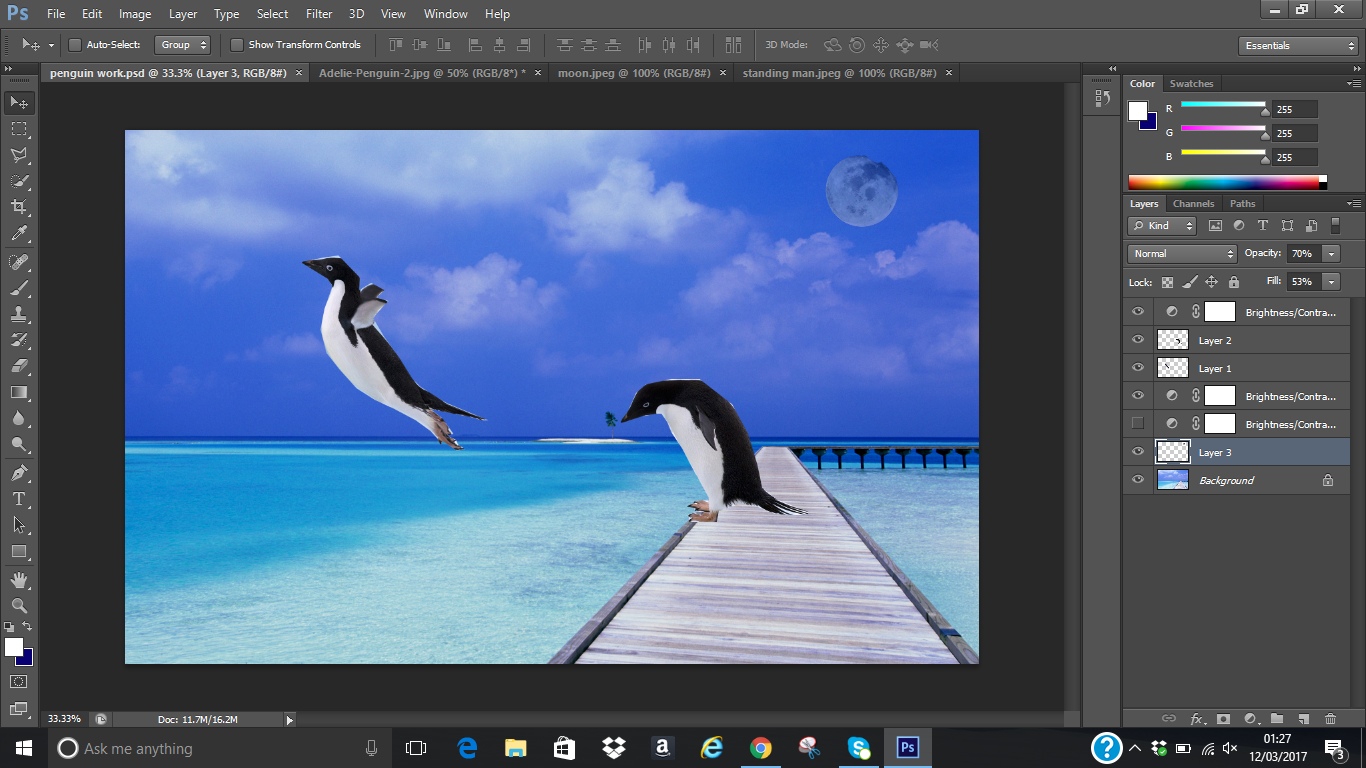
I actually tried another Photoshop with the penguin. This time around I added a man walking. I used polygon lasso tool to select  the penguin and the man and placed on the background. I am satisfied this time around with the penguin shape. I used opacity of 61% for the moon. I also set the brightness to -40% because I wanted it to look like it was getting to evening. Contrast remain at 0. This is the image I finally come up with. Although the moon I used was very tiny, in the process of trying all the icons I was able to enlarge it but forgot what I did to enlarge. I remember I adjusted the width and height but can't remember to what figures. I tried to use create new gradient map adjustment layer but did not like what I saw so I left it looking like this picture below.


FIRST PHOTOSHOP

 This exercise was done in class. First time ever I
 will use Photoshop. Hmm... not bad though.
The two images was gotten from the internet. What I was to do is to move the penguin from the second picture into the first picture using lasso tool.

.

First thing I did was to click on the lasso tool and clicked polygon lasso tool to see how it will work for me. I used the polygon lasso tool to select the first two penguins one after the other by clicking and dragging the cursor to get dotted lines for the selection. When the line meets, that is, when I got to the starting point, the dotted line automatically joined and it was visible with the way the dotted lines were shaking.I then dragged the image onto the first image that is meant to be the background.


Now, this is the new image I got. I added moon to the background image to give it an evening look. I actually adjusted the moon shade by using brightness/contrast icon on the right hand side of the adobe Photoshop.

I am not fully satisfied with the shape of the flying penguin's head (not a smooth head from my selection) and I decided to do it again and correct myself to see if I will be better.
Until then, bye.


INTRODUCTION TO PHOTOSHOP

INTRODUCTION TO PHOTOSHOP
  

   DEFINITION: Photoshop is a brand name for computer software used to digitally alter digital photographs or other photographs. The definition is gotten from dictionary.com.
Why Photoshop? Photoshop creates an artistic virtual studio. Adobe Photoshop is a standard tool commonly used by experts for digital imaging. Image of a person or thing says a lot more about it than can ever imagine.  Learning Photoshop is a good way to learn imaging concept.  Below are the lists of the basic tools in Photoshop and what they are used for.
  
  MARQUEE TOOL: since in Photoshop the images are saved in pixel, marquee tools are used in selection of the images. Marquee tools are rectangular, elliptical, single row or single column marquee.
    
  Rectangular Marquee tool allows one to easily draw selections based on simple rectangle or square shapes. Rectangular marquee is used by selecting it and placing the cursor somewhere in the upper left and drag the mouse. The selection will be seen expanding as it is dragged towards the centre. When the rectangle has covered the area wanted in the image, the mouse button can then be released. By clicking and holding the selection in the middle and moving the cursor, one will notice how the selection is moving along with the cursor. This is used to copy and paste images, move images and apply filters to it.
   
  Elliptic Marquee tool: This tool extends our selection possible with the use of oval or circle shapes. It does the same as the rectangular marquee tool.
   
  LASSO TOOL: Lasso tool is also used for selection like marquee tool. However, with Lasso tool, one can make freeform selection. Lasso tools include polygon lasso tool and magnetic lasso tool.
    
  Polygon lasso tool: The black arrow on the top left is where the click point is. Click once on the image, move the mouse around the image and click through the area you wanted. As you move the mouse, the starting point remains pinned and a dashed line extends towards the cursor. When the starting point is reached and the selection is complete, one is now ready to copy the selected image.
   
  Magnetic lasso tool: Click and hold the mouse button with the cursor pointing at the image, drag around the image slowly. Notice as you drag, the selection snaps to the image as you move.

  NOTE: To cancel any selection, control D or escape key can be pressed.
   
  CROP TOOL: When crop tool is selected, you will notice small handles on the corners and on the edges in the centre of the image. To crop an image, either drags the handle to surround the part of the image to keep or click and drag inside the image to draw the area to crop. This can be adjusted by clicking and dragging the corners to resize the area wanted.
   
  TEXT TOOL: This tool is used to write text to describe the image. To adjust/edit the text from the menu bar; font family, font style and font size can be used as desired.
    
  BRUSH TOOL: The brush tool consists of pencil tool, color replacement tool and mixer brush.
   
  Pencil tool is used to draw lines of varying thicknesses
      
  Colour replacement as the name implies is useful for replacing color with another colour.
    
  Mixer brush mixes together different colors.
    
  SHAPE TOOL: This consists of Rectangular tool, Rounded Rectangle tool, Polygon tool, Line tool, Ellipse tool and Custom Shape tool. Shape tool is used to draw shapes with desired sides.
    
  GRADIENT TOOL: This comprises of gradient tool, paint bucket tool and 3D material drop tool. Paint bucket tool help to fill any given area with the colour of choice. Gradient tool allows the use of 2 or more colours for smooth blending.
    
  PEN TOOL: This is made up of pen tool, freeform tool, add anchor point tool, delete anchor point tool and convert point tool.
    
  Add anchor point tool: This tool is used to add anchor point to an image when necessary.
    
  Delete anchor point tool: This tool is the opposite of the add anchor tool. It is used to delete unwanted anchor point in an image.


Thursday, 9 March 2017

INTERFACE ICON

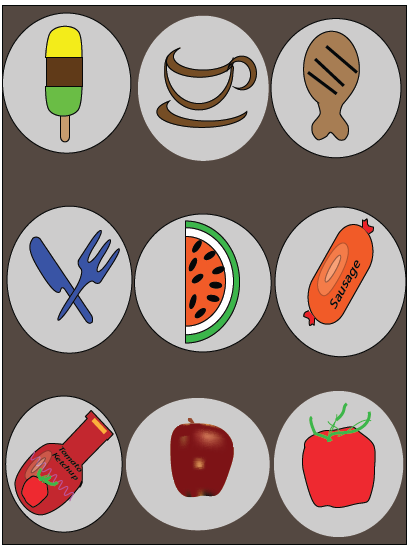
For the interface, I arranged each of my drawings on individual background then put together on a background and grouped together to achieve the interface.

DRINK

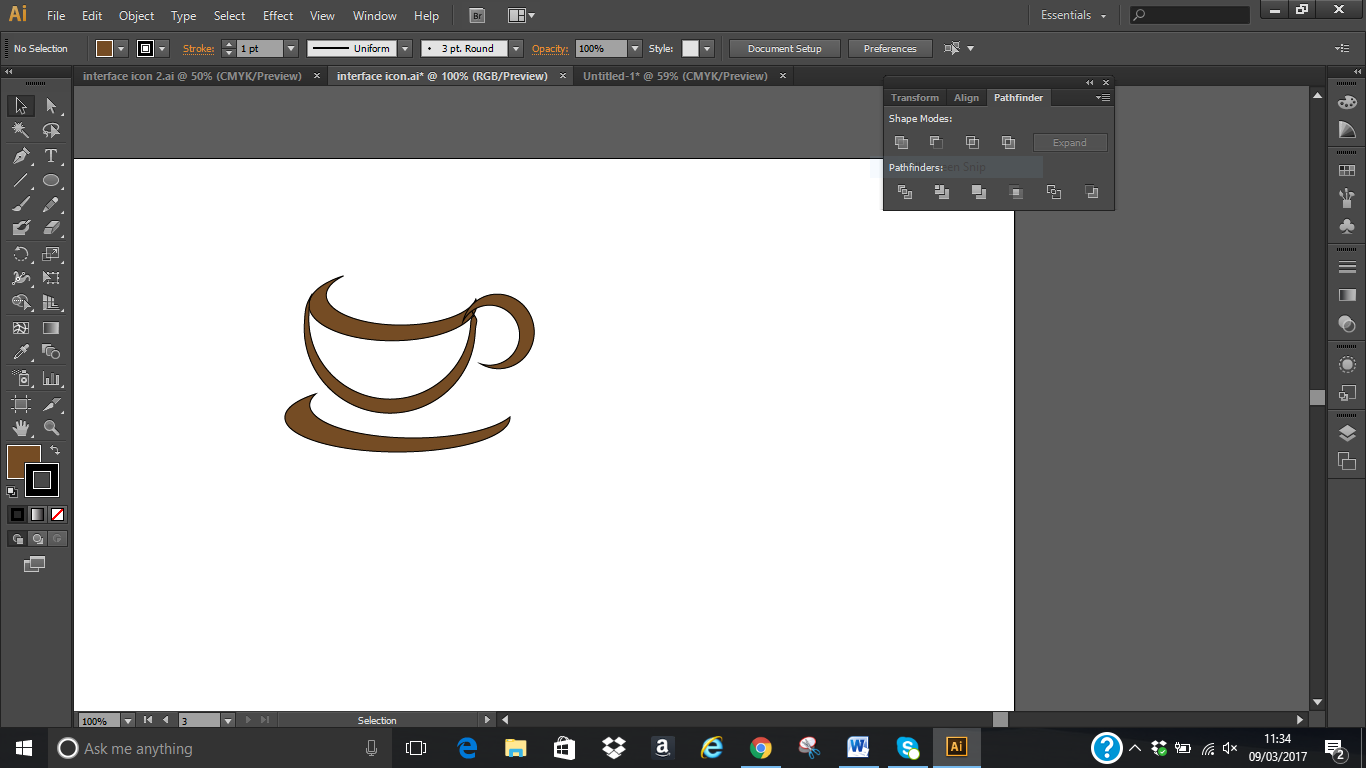
For the drink, I used ellipse to make an oval shape with brown filled colour. Clicked on select then edit > copy > paste in front, set the two oval shapes over each other, select the two and used minus front from pathfinder to make it a compound shape like a half moon.


Made another shape but this time around it was a circle. Clicked on select then edit > copy > paste in front, set the two circles over each other, select the two and used minus front from pathfinder to make it a compound shape. Then object > group to join them together. 


Another oval shape was made for the base following the same method. That is, Clicked on select then edit > copy > paste in front, set the two oval together, select the two and used minus front from pathfinder to make it a compound shape.


Same process was repeated for the handle and then grouped together to make it one. 

Wednesday, 8 March 2017

ICE CREAM

Now for the ice cream, I used rounded rectangle tool, picked the pen tool and drew two straight lines that cut the shape into three parts. After, I used window > pathfinder > divide to ungroup. Then filled each layer with the colour of my choice. Used the rounded rectangle tool to draw the stick and fill with lovely brown. After which I used pathfinder to unite them together with the brown stick and grouped together using object > group.